Want to learn how to make your very own layouts? Good, lets get started.
So to start off I'm going to go through how to edit a photo to use it for a layout. I personally use https://www.ribbet.com. which is a super great free photo editing website, of course you can also use paint, are a computer art program but you wont have nearly as many options. So lets head to ribbet.com.
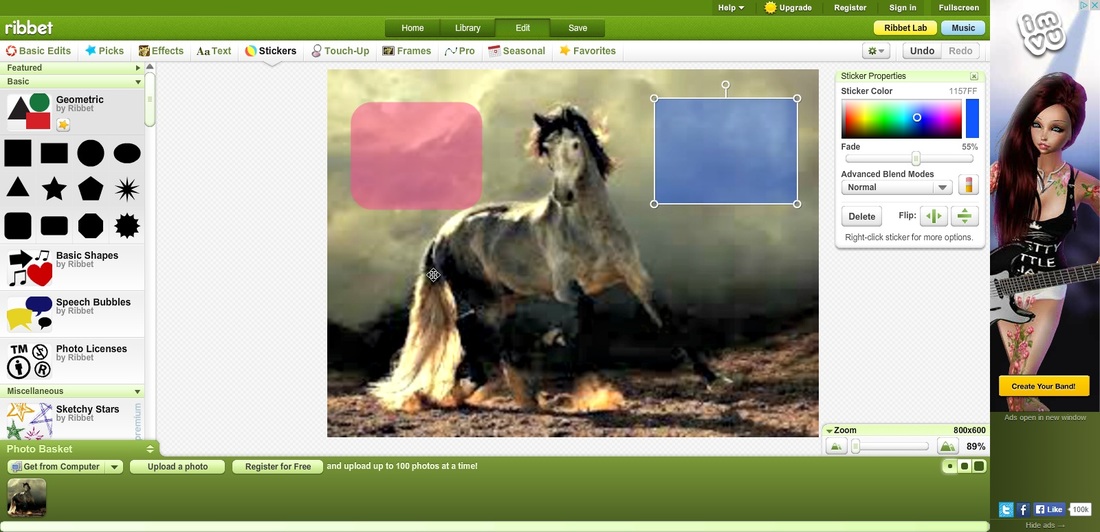
So first you size your picture. This is under the basic edits tab, remember you want 800 for wide layouts and 400 for small. Once its sized you can add places for text boxes. This is under the stickers tab. So what you want to do is pick either a square or rectangle shape, and it can have hard corners or soft then you can change the color and transparency as shown in the picture below. As you can see the pink box is soft edges and the blue is hard. The choice is yours.
So first you size your picture. This is under the basic edits tab, remember you want 800 for wide layouts and 400 for small. Once its sized you can add places for text boxes. This is under the stickers tab. So what you want to do is pick either a square or rectangle shape, and it can have hard corners or soft then you can change the color and transparency as shown in the picture below. As you can see the pink box is soft edges and the blue is hard. The choice is yours.
The next step is adding text (If you want it), This can be your username and titles for your text boxes or the fact that it was you that made this.
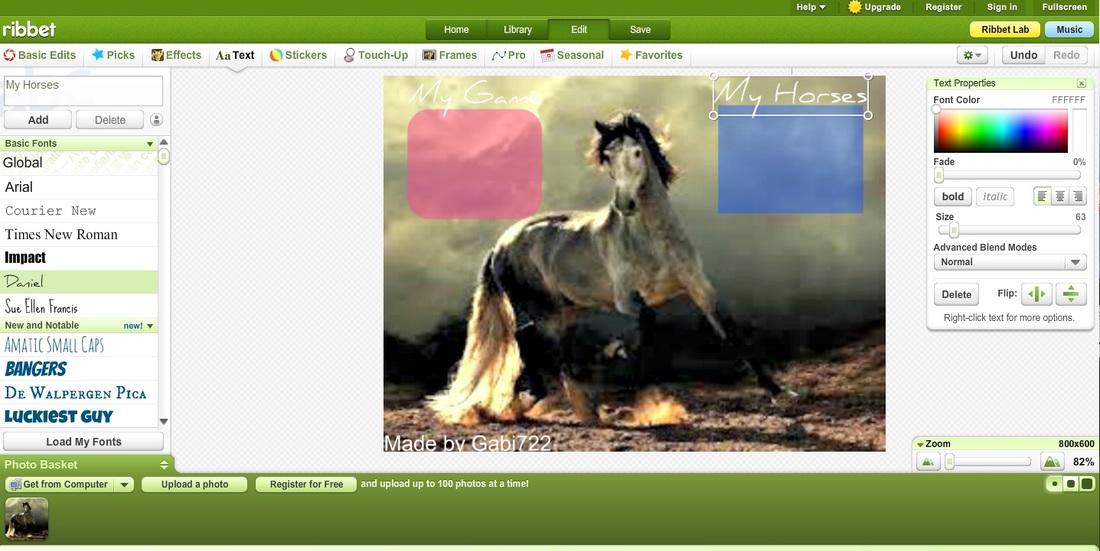
So as you can see on that you have the size and color on the right and the font style on the left, so all you have to do is type the text you want in the box on the upper left, select your font style and press add, then you can change color and size. Reposition your text by dragging with your mouse.
Once your Picture is done, you need to save it to your computer, then head to tinypic.com or some other free image hosting site, and upload your photo you'll need the direct link for layouts version of the url for your coding which we are just getting to now.
Just remember as we get started, don't get caught up in the wacky computer language, with a little practice you'll be making layouts in no time :)
To make sure you're coding right as you go along I recommend this HTML editor
So first we need your background image.
first you'll need to code this part of the layout: <div style="background: url('ENTER YOUR URL HERE'); width: 800px; height: 600px;">
So this part is very simple all you need to do is enter the direct link for layouts link from tinypic in where it says ENTER YOUR URL HERE. And remember when you resized your picture, well now you need to put the size in where it says 800 and 600.
Now we need text boxes, so for this you'll need this part of code:
<div style="width: XXXpx; height: XXXpx; overflow: auto; text align: XXXX; margin-top: XXXpx; margin-left: XXXpx; float: left;">
So with this you'll need to fill in all the pink things. The width and the height are how big your text box will be, so for now just put 100 and 100. Now the text align you can either put right, left or center. Its just how your text will be aligned. Now we come to the margins, which are VERY importent. If your margin is closer to the top then the bottom you can change margin-top to margin-bottom, and same with left to right, or you'd just have big numbers in each of them.
So begin by typing 100 and 100, and see where is is, is it too far down, change the top align to a smaller number, same if it too far to the left, and if its not far enough down or to the left, make the number larger. Play around with this until your box is aligned with your rectangles on your picture.
Then you'll need font and color and size of font. So add this peice of code:
<font color="black" size="2" face="arial">
So just enter in any normal color like, black, red, green....etc. And for font style enter in any font family, such as arial. You can also change the size if you'd like but, it easy to just leave it at 2, plus its pretty much the best size.
Now you can just keep adding text boxes for each one you need and size them and get them in the right spot.
Then add this to each text box to make sure it scrolls okay:
text text texte text text text text text text text text text text text text text text text text text text text text text text text text text text text text text text text text text text text text text text text text text text text text text text text text text text text text text text text text text text text text text text text text text text text text text text text text text text text text text text text text text text text text text text text text text text text text text text text text text text text text text text text text text text text text text text text text text
Then to finish off the text box add this section of code:
</font></div>
Then once your done with all your text boxes add one last final:
</div>
All alone on its own line. Anything you add after this will not show up in your layout.
HAVE FUN!!!
I'd like to thank The Book of Howrse and thewarrenranch for helping me to learn coding, so I can now teach others!! :) :)
